Difference between revisions of "FanControl"
m (No knock off tools will be accepted!) |
|||
| Line 62: | Line 62: | ||
Pics and schematic to follow soon(tm). | Pics and schematic to follow soon(tm). | ||
| + | |||
| + | |||
| + | == AMV - First try == | ||
| + | |||
| + | Finally got around to make a schematic. It is based on a [http://en.wikipedia.org/wiki/Multivibrator standard AMV] and it the output drives a Darlington coupling made up of a BC547 and a BD139 ( any medium power NPN will do ). Assembly will be done shortly(tm), with the Molex connectors, for both input and output supplied by Mhl :-) it will be build on a prototype board and installed in the above-mentioned CDRom enclosure. Stay tuned... | ||
Revision as of 16:18, 10 October 2010
Prelude
When I bought my antec P180 pc tower, it came with its own fan control, a simple one, a switch that changes the supply to the fan to 12 / 7 or 5Vdc. As it so happens, I enjoy a noise-free pc, the fans run at 5Vdc. No problem. UNTIL, they got worn, dirty, br0ken ect, they now can run at 5Vdc, but can not start up, a common problem with 12Vdc Fans and ppl that try to run them at 5Vdc.. After about 2-3months of switching them to 7V and back to 5V when booting the pc, I decided that it was time for a fan control.
Pre-Dremel
2 things to consider when wanting a fan control in the pc:
- What kind of control? Linear or PWM ?
- How to mount it without damage to the cabinet yet still possible to reach it to adjust speed on those warm summer days.
First: PWM, inspired by the work of mhl's fan-control and that of Giorgos Lazaridis(PCBHeaven)
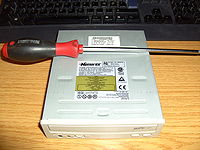
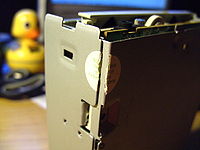
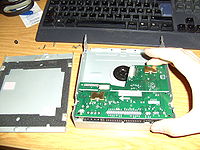
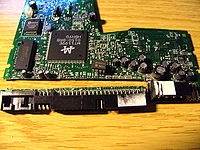
Second: An old CD-rom drive! take out the inside and we have a nice case that fits PERFECTLY into any normal PC tower. Things that shall be preserved from the CD-ROM drive: The case, naturally, and a part of the PCB, the part that has the power connector, thus we now also have an ATX comparable connection to our home-brew, isn't that nice?
It just so happens, that the drive I took apart had small 0 ohm (approx..) smd resistors on the +5Vdc and +12Vdc line, those we can remove and now have isolated the rest of the original PCB from our homebrew. how nice. Should place my own kind of fuse though, more on that later.
I know, simple but brilliant :-)
Post-Dremel
Coming soon(tm) As I do not have a Dremel at home, only at work.
Update:
Just to prove pit wrong, I DID bring the PCB with me to work, I DID cut it, I DID find a 555 :-)
The actual pcb will have to wait for tomorrow...
Failure of the 555
As noted, I did a copy of PCBHeaven's pwm circuit made around a 555. This was my first 555 circuit, ever. Not much thought was put into it.
The first ran a 2Khz, the "Torque-kick" was indeed very loud, adding the cap across D-S did help some, but not much, and change the regulation as it would now run at a lower duty cycle. Next up was 20Khz, without cap. It did work, more or less, the noise was gone or at least moved out of my hearing range, but the 555 was not able to drive the FET....
As it turns out, "all" 555 PWM regulations do not use the actual OUTPUT of a 555 as OUTPUT, but use pin 3 instead, this pin was never made for driving any kind of load, and thus it had problems keeping my FET happy at 20Khz.
The FET I use, is a IRF1404, overkill, I know, but I do like overkill when it can be implemented with ease. She has a Gate-Source capacitance around 6nF. If I wanted to use 20Khz and have a rise time better than 20x the freq, the output for driving this FET would need to have a output resistance of less than 83ohm (math: 5 tau, known wanted time and known C at 6nF)
Now I could do this: put a OPamp buffer after the 555, but it would be a bit too much V'ger to my liking.
To keep up appearance, I will make a good old AMV based on BC547's and a log. potentiometer, it being log. is mainly because those are normal in dual / stereo versions and the fact that the fans speed vs. supply voltage is not linear, the regulation does not have to be either.
Pics and schematic to follow soon(tm).
AMV - First try
Finally got around to make a schematic. It is based on a standard AMV and it the output drives a Darlington coupling made up of a BC547 and a BD139 ( any medium power NPN will do ). Assembly will be done shortly(tm), with the Molex connectors, for both input and output supplied by Mhl :-) it will be build on a prototype board and installed in the above-mentioned CDRom enclosure. Stay tuned...


